The CREATIVE side of YOU!

Artsy Journeys is the ultimate Art Adventure! There are no rules, no judgments, no special applications and no previous experiences necessary to create amazingly beautiful art drawn from your experiences and imagination.

Become one with your thoughts, ideas, dreams, memories and your goals through random applications of color, embellishments and how you happen to feel that day!

Join me and together we will explore and embrace that Art Adventure and walk that path of beauty.
Showing posts with label art studio renovations. Show all posts

Wednesday, August 26, 2015

DIY hanging rack from a baby crib!

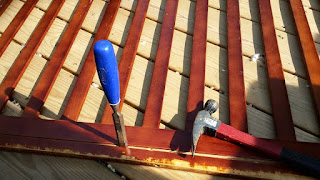
Taking off the pegged top piece on rail
As professional artists, we have 2 art studios on our property. The larger one is big, beautiful and built from a torn down 1910 house!
Our smaller one is my "cabin in the woods" and was a tired 10 x 20 storage building that we renovated for additional room in our ever expanding art business!

 So in my small Art studio that I use for my silk making, I needed a place to hang my scarves while I worked on them. I use an outside clothesline which is perfect for drying. But in between some stages of my techniques, I needed a place to gently hang silk without folding it or dropping it on the floor :-)
Crib rail hinged to wood attached to wall.
 The solution came in the form of parts of a free baby crib! Used cribs can be found at yard sales for next to nothing and the sides can be used for any number of creative projects!


My idea was to attach hinges to the bottom , attach it to the wall of my small studio and have it fold down from the top.  When in use, the lightweight chains would let me lower it to pretty much any height I wanted. I did not want it level, just out a foot or so from the top of the wall. When not in use, it folds back up to the wall and hooks with regular latch hooks :-)

Small chain, latches and hinges are easily found in any hardware store!

A little paint on the wood the piece is hinged to will make it look finished :-)

As you can see, the lightweight silk dangles easily from the rack away from the wall. It could be closed as well if I choose.
A perfect solution for everything from fabric to paper to your laundry room.

Raise the chains higher if heavier items will be hung. The ceiling is barn style so hanging this from the ceiling where the lights are was not an option-too high and the lights were in the way so this "Murphy style" rack was the perfect solution!

An easy DIY project accomplished is an hour or less.

Thursday, May 14, 2015

DIY studio renovation!


Things are moving along with my "cabin in the woods!"
If you have been following me, you'll know that I have been renovating a 12 x 20 shed and turning it into a second art studio.  It's been taking a few months but bit by bit the big things get done, then the little things :-)

Below are some "in progress" photos of the north end of the building. 


The deck going in.


Here is the plain jane studio in the making.


In the back ground is the large studio-our workhorse location. In this one I have begun to move all the dyes, paints and supplies related to my silk designs


Deck being built.
We  re-purposed a used 6' sliding door for the north end of the studio!
The 6' sliding door going in
 And now, with the deck completed, we can enjoy an beautiful extension of our studio and work on it even as we complete some minor details inside! Hubby has wasted no time...not have our dogs!


Notice the wild roses along our pasture fence add screening and privacy...not that we really need it on our mini-farm but it is perfect for an artist's studio! 
heading out to the office takes on a whole new concept for me when this is one of my offices!


Sunday, April 19, 2015

Murals on Kitchen Cabinets

Painting murals is not new to me. From my teens on up, I have painted scenes on walls, doors, commercial window displays and traveling circus trailers. (really!)
Sometime it can go faster than painting the same thing on canvas that same size. Don't ask me why. it just does.
If you have followed my "cabin in the woods" renovation you'll know that my building came with cabinets recycled from a 1950's kitchen. The wood was that hard to find solid "thwunk" type wood found in your grandma's kitchen. And it also meant it came with that dark varnished look so popular once upon a time!
I removed the doors...sanded them, then painted them...more than once, with white primer.
White doors with a mural on panel below it that I painted a few years ago
White walls, white ceilings, white cabinets. Something had to change before I started moving my art supplies into it.

I went to my computer and pulling from my folder of "random traveling photos" that I accumulate for ideas, I thought.....actually I knew what I would do if I went one of two ways-mountains. Or beach. I settled on mountains :-)
Sequence of steps

So I painted in the sky, added the clouds and then started the background. It's a whole lot easier to add the foreground after the background is completed. Otherwise you will try to paint around a tree or around the leaves and it doesn't work.....at this point I tossed the pencil and just started winging it. Take a look :-)

Adding Mountains and tree details
You can see where this is headed as I added the mountains.

At this point I had to decide what to do with the section to the far right. These cabinets are a little over 12 feet long and 4 ft high.

My plan is to add a sink under the shorter cabinets when I eventually get the water running to the studio.


You can just see where I added a white path to the far right.


Here's a closer look at the left side below


Bringing in a middle ground and foreground
A friend sent me some stunning photos of texas bluebonnets and Indian paintbrushes and I had my plan for the right hand side!

See what's been added!
DONE!
So there you have it-a soothing mountain view with birds, flowers....forgot the butterflies but hey I can add them later :-) So be brave-paint a door panel, closet doors, kitchen cabinets or anything else that strikes your fancy! And it you want to take it with you at some later date, just paint it on some lightweight plywood (birch is good) and screw it to the surface.
Go paint!

Wednesday, February 25, 2015

A cabin in the snow! The art studio journey continues.

So here we are at the end of February 2015 and the "cold winter" predictions have come true!

Just one of a number  this winter!

Last winter collage and our cabin before renovations!
New England continues to dig out from yet another snowstorm...I think I read 7 feet of snow in 4 storms in 1 month! And we wait for a new system to come in tonight-one in which NO one seems to know what will happen (ice, sleet, little snow, lots of 
snow?)


We have purposefully kept our large art studio cooler since we don't want to burn through too much propane. That means I can move a lot of my silk work inside the house to my office. 

There is a definite space advantage after the kids leave home!

IN my next post I'll share some of the silk projects I am doing but right now here are a few of the images of the progress we are making with our "Cabin in the Woods" which will actually be a smaller studio but still a cabin feel to it!

Enjoy our DIY efforts!


My artist hubby working late at night (with the help of a portable heater)

The mudding of the sheetrock is now DONE!