The CREATIVE side of YOU!

Artsy Journeys is the ultimate Art Adventure! There are no rules, no judgments, no special applications and no previous experiences necessary to create amazingly beautiful art drawn from your experiences and imagination.

Become one with your thoughts, ideas, dreams, memories and your goals through random applications of color, embellishments and how you happen to feel that day!

Join me and together we will explore and embrace that Art Adventure and walk that path of beauty.

Wednesday, December 2, 2015

Eco printing on silk

Eco printing, alpacas and time travel

What? It's December? When did that happen? :-)
I have run through 2 months of combining silk work and portraits and December simply brings a bit of panic into it!

I dug into the eco printing and have had some gorgeous results!
Various kinds of eucalyptus

It takes practice but in the end...the thrill (yes it is) is in not knowing what you'll create!

But knowing that I'm printing Nature's colors exclusively is another appeal to this art form.

I spent 10 days in October at the NC State Fair as the silk artist in the Village of Yesteryear
rose leaves from Seven Sisters

Heirloom roses and pineapple sage
and although it was tiring with daily 12 hour days, I met SO many people who were happy to add a scarf to their handmade collections!
November seems to have dissipated and I don't know where it went to. I do know that I am on a borrowed computer as mine bit the dust (although Best Buy is determined to make it work since it is under warranty) and I had no idea how many of my photos were on the other computer. Luckily I have Carbonite backup but having to make temporary folders to store work is time consuming.

I'll pop some portraits up in my next post...seems odd to mix them with the silk. :-)

Oh and I must add one more image....Bella! The newest member and a future supplier of fiber for adding some roving into some of my silk!


Meet Bella!

Wednesday, August 26, 2015

DIY hanging rack from a baby crib!

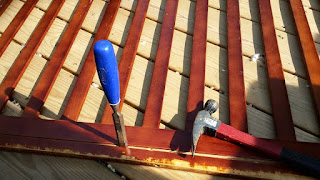
Taking off the pegged top piece on rail
As professional artists, we have 2 art studios on our property. The larger one is big, beautiful and built from a torn down 1910 house!
Our smaller one is my "cabin in the woods" and was a tired 10 x 20 storage building that we renovated for additional room in our ever expanding art business!

 So in my small Art studio that I use for my silk making, I needed a place to hang my scarves while I worked on them. I use an outside clothesline which is perfect for drying. But in between some stages of my techniques, I needed a place to gently hang silk without folding it or dropping it on the floor :-)
Crib rail hinged to wood attached to wall.
 The solution came in the form of parts of a free baby crib! Used cribs can be found at yard sales for next to nothing and the sides can be used for any number of creative projects!


My idea was to attach hinges to the bottom , attach it to the wall of my small studio and have it fold down from the top.  When in use, the lightweight chains would let me lower it to pretty much any height I wanted. I did not want it level, just out a foot or so from the top of the wall. When not in use, it folds back up to the wall and hooks with regular latch hooks :-)

Small chain, latches and hinges are easily found in any hardware store!

A little paint on the wood the piece is hinged to will make it look finished :-)

As you can see, the lightweight silk dangles easily from the rack away from the wall. It could be closed as well if I choose.
A perfect solution for everything from fabric to paper to your laundry room.

Raise the chains higher if heavier items will be hung. The ceiling is barn style so hanging this from the ceiling where the lights are was not an option-too high and the lights were in the way so this "Murphy style" rack was the perfect solution!

An easy DIY project accomplished is an hour or less.

Sunday, August 9, 2015

Kids Learning to Play like Kids!

Taken from my MTheresaBrown blog!

Kids Learning to Play like Kids!

I take my childhood for granted. But now I know that I, and my peers, were oh so fortunate to have grown up in the years that we did! These were the years where kids played outside all day, came home when all the neighborhood moms stood on the porches and stoops and called us in.....where we climbed trees, ran for the sheer joy of it, picked berries, built forts and our water parks were wading pools and water hoses!

I re-create part of that in my art summer camps. And the kids have a ball! It is different because the kids work with art, outdoor play and critical thinking skills....and through it all I expect the grouped ages of 7-17 to work, play and create together. And they do!

Coming to our 2 art studios out in the country-both are our professional ones- in itself is an adventure. Being free to run at will outdoors down the secret paths of the maze, climb the maple and pecan trees, and in general, be kids, is actually a new experience for many of the students.  But by day 2, they are enjoying the freedom of outside activities and that pumps up their creative processes!

Collage 1


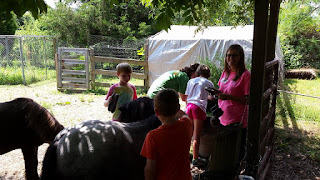
Enjoying the ponies


The lunch tree

Without a doubt the favorite tree!


  I hope to add more camps next summer-it's definitely something I have to bring in extra help as the camps can have up to 14 participants. Many are repeaters. Many are so improved by the 3rd day of camp-both artistically and physically! (who knew climbing trees was so hard?) 
So add to that mix-getting wet, dirty, loved by dogs, ignored by chickens (but collecting the eggs is fun!) running the secret trails....and you have the incredible experience that I so took for granted as a kid...(thanks Mom and Dad for letting me be a free range kid and artist!)

Thursday, May 14, 2015

DIY studio renovation!


Things are moving along with my "cabin in the woods!"
If you have been following me, you'll know that I have been renovating a 12 x 20 shed and turning it into a second art studio.  It's been taking a few months but bit by bit the big things get done, then the little things :-)

Below are some "in progress" photos of the north end of the building. 


The deck going in.


Here is the plain jane studio in the making.


In the back ground is the large studio-our workhorse location. In this one I have begun to move all the dyes, paints and supplies related to my silk designs


Deck being built.
We  re-purposed a used 6' sliding door for the north end of the studio!
The 6' sliding door going in
 And now, with the deck completed, we can enjoy an beautiful extension of our studio and work on it even as we complete some minor details inside! Hubby has wasted no time...not have our dogs!


Notice the wild roses along our pasture fence add screening and privacy...not that we really need it on our mini-farm but it is perfect for an artist's studio! 
heading out to the office takes on a whole new concept for me when this is one of my offices!


Sunday, April 19, 2015

Murals on Kitchen Cabinets

Painting murals is not new to me. From my teens on up, I have painted scenes on walls, doors, commercial window displays and traveling circus trailers. (really!)
Sometime it can go faster than painting the same thing on canvas that same size. Don't ask me why. it just does.
If you have followed my "cabin in the woods" renovation you'll know that my building came with cabinets recycled from a 1950's kitchen. The wood was that hard to find solid "thwunk" type wood found in your grandma's kitchen. And it also meant it came with that dark varnished look so popular once upon a time!
I removed the doors...sanded them, then painted them...more than once, with white primer.
White doors with a mural on panel below it that I painted a few years ago
White walls, white ceilings, white cabinets. Something had to change before I started moving my art supplies into it.

I went to my computer and pulling from my folder of "random traveling photos" that I accumulate for ideas, I thought.....actually I knew what I would do if I went one of two ways-mountains. Or beach. I settled on mountains :-)
Sequence of steps

So I painted in the sky, added the clouds and then started the background. It's a whole lot easier to add the foreground after the background is completed. Otherwise you will try to paint around a tree or around the leaves and it doesn't work.....at this point I tossed the pencil and just started winging it. Take a look :-)

Adding Mountains and tree details
You can see where this is headed as I added the mountains.

At this point I had to decide what to do with the section to the far right. These cabinets are a little over 12 feet long and 4 ft high.

My plan is to add a sink under the shorter cabinets when I eventually get the water running to the studio.


You can just see where I added a white path to the far right.


Here's a closer look at the left side below


Bringing in a middle ground and foreground
A friend sent me some stunning photos of texas bluebonnets and Indian paintbrushes and I had my plan for the right hand side!

See what's been added!
DONE!
So there you have it-a soothing mountain view with birds, flowers....forgot the butterflies but hey I can add them later :-) So be brave-paint a door panel, closet doors, kitchen cabinets or anything else that strikes your fancy! And it you want to take it with you at some later date, just paint it on some lightweight plywood (birch is good) and screw it to the surface.
Go paint!

Wednesday, April 8, 2015

50 Shades of Green

Gray landscapes...even when the sun comes out the many shades of gray that form my vision of winter, linger.  The first spring flowers and the early blooming Bradford pear trees pop out to brighten the landscape but their background is still gray.  Then, as if overnight, the barren landscape turns into very subtle shades of green. At first it's just a filmy green; Like someone placed a green filter over a black and white landscape.  Then it becomes more and more obvious-almost as if the dark shades are being absorbed into the softer greens. And that is what it is-soft gray greens at first. Fifty shades of green.
Within a week, the maple "helicopters' are dangling from the trees and the honeysuckle leaves are opening.....
and then everything begins to announce that it is April in North Carolina and time to renew that glorious feeling that only comes with Spring!
Crab apple tree

Spring plowing and 50 shades of green

Maple Tree seeds

The wild dogwood under the sycamore

Sunday, March 22, 2015

Wiz kid artist stuns my art class! :-)

Wet into wet painting techniques and the results!

The first class ever using the wet into wet oil painting technique was March 21 at the Vance Granville Community College!   Under the category of Personal Enrichment, 
The 5 intrepid painters created some amazing art.
I brought along my assistant-10 year old Alex who embraced the Bob Ross techniques last year by recording hours of video after his mother took away his Electronic time-what a great move by mom! And then he began to paint!
Alex with a few of his many beautiful paintings!

Children will naturally turn to creativity when the TV, electronic games and cell phones are removed-all to everyone's benefit!

From 12-5, the class stayed in the art zone and we had a great time! We practice wet into wet with acrylics as well but you have to paint faster. It was easy to take a snack break in the middle of the workshop as oil will not dry for days.
I'll let the photos do the talking!
collage of the finished paintings

This class introduced the use of a palette knife, letting wet paint blend into wet to create particular effects...and of course the sky is the limit when it comes to taking what they have learned and use the same techniques on a myriad of subjects!


Next similar class is April 17 from 12-5.


I encourage photographing the steps

Learning to use the palette knife

Laying in the background

Thursday, March 19, 2015

Going to the Dogs. My artistic journey!

Going to the dogs...artistically!

After finishing up 2 weekends...long weekends..... of shows, I found myself going to the dogs. On my easel.
I already live with 5 dogs and with a background that once encompassed dog shows, dog training and pet boarding (with a 100 run kennel no less!) I find it as easy to return to a life with dogs as I do with horses :-) 

Our pets occupy a special place in our hearts and it's easy to see why my collectors love to have  portraits of these special families members created. And I have created hundreds...perhaps thousands, over the years! 
At these last two shows I created Jack Russell Terriers and a Corgi puppy. Both are two of the most popular pups at the horse shows although I am seeing more and more mixed breeds-a nod to the efforts of  dog and horse rescue groups that work hard and diligent to place their charges in the best homes possible!   The "Tiny Urls" take you to my Etsy store where you can see these much larger!

All 3 are available as originals, for purchase :-)

http://tinyurl.com/nueldyg

http://tinyurl.com/oznpjqf

http://tinyurl.com/o5m5rcn


Going to the Dogs is a special place I think. When it comes to your canine companions, every day is a good day! And that is a nice place to be :-)


Friday, March 13, 2015

Artsy Duplication

Since I am heading out the door I am unabashedly copying my blog from "MTheresaBrown" so that I can keep you updated! It's just Artsy Duplication!


Art studios, landscaping and chickens...

Finally! Warmer weather! My poor ponies have a sea of dried mud around their run-in shed that will again turn to mush with the upcoming expected rains but MAYBE there will be a week with no rain, snow or mix after that! 


So the renovation on the small studio is drawing to a foreseeable end...at least the walls are painted-white. I cannot bear the thought of anymore interior darkness! Hubby Steve is putting in the work counter...same height as a bar-that could be nice too!


I have been doing some raking and semi-landscaping. What that really means is that there was wire  along the edges of the pasture fence that the pretty vinca flower vines had grown through and covered so I have actually had to use a pick ax, short and long handled pruning clippers to get up...a lot of it. I guess I noticed it but then did nothing about it...just ran the lawnmower around that nice long clump of dark green vines with their purple summer violets.   After I finally spent 2 days yanking, digging and chopping at it all, the wire is up....followed by curious chickens who went to work digging in dirt I had conveniently already "undug" for them.  


We are at a show right now so other than popping up an image of a recently completed and now shipped painting, I am off to make some sales today (always a good thought-heck it's the goal!)


Follow my journey with me and see how I set up the inside of a 12 x 20 studio!


Tuesday, March 3, 2015

Silk screening on silk techniques

Silk screening is one of those things that bypassed me in college. I don't know why or how exactly. I can etch on zinc plates covered with asphaltum  and sunk into acid baths. I can pick up a linoluem block and hand carve it to print on. But I never learned to use a silk screen.
Then of course everything changed with the computer and silk screen seemed to be going the way of the dark room for photographers.....but oh my, now I've had a taste of it!

So with just the barest of equipment I have begun to screen on my silk scarves. It is the layering that really attracts me! Just like my layers in my abstract paintings, I can form layers on the silk.

Once I figured out how to burn an original image onto a transparency (courtesy of a friend and my hubby !) I saw the possibilities open up!


The collage is from a day with a girlfriend who has done this awhile.
The photos below it are the scarves I just completed using the method. Enjoy the beautifully colored layers! Some were done with Lumiere dye that adds a cool shimmer to the colors.

adding layers on already dyed scarf and my friend cleaning a film


My teal layers

Add caption

Eggplant with dragonflies

Abstract flower layers

My abstract horses


Thursday, February 26, 2015

The power of snow

It's very early in the morning and too dark to take outside photos but oh the power that a heavy snowfall invokes! The household is still asleep with the exception of Troop, the Corgi who felt it necessary to go outside at 5 am. Imagine his surprise as he hopped into the 6 plus inches of snow, not quite realizing the bottom step was now invisible, covered by the snow-quite an event for a short legged dog!

There is power in a snow event anywhere I have lived-whether it is 6" or 34", Foremost is the stillness it creates. There is a hush that we don't realize silences our daily lives until we experience the softness that comes with snow-quiet, muffled, still.
A snowfall, first thing in the morning  brings a peace-for me at least and memories of snows gone by - pf my childhood, my children's childhood-fabulous memories that bring back a warm fuzzy feeling of having experienced the power of snow and what it can evoke in the senses, experiences and memory.
Just starting

With hot coffee in hand, a fire in the fireplace, I am waiting for the sunrise to experience the complete visual effect of the snow. The artist in me loves the transformation of the familiar trees, buildings and landscape.  I enjoy the tang in my senses when I step into the cold and t satisfaction that comes as mentally I check all the boxes in my brain in regards to my animals-inside and out-food, water, shelter-check. Not even the chickens are stirring or the wild birds that have congregated in recent weeks at my feeders as the winter ramps up. By the end of February, people have wearied of the cold and snow....but this year winter is not over and only teases us with sunny warm days tossed at random between winter storms and temperatures.

The power of  snow is in the senses, the memories and the seed catalogs that promise and remind us that spring is just around the corner. Be patient and enjoy the stillness today brings.


Wednesday, February 25, 2015

A cabin in the snow! The art studio journey continues.

So here we are at the end of February 2015 and the "cold winter" predictions have come true!

Just one of a number  this winter!

Last winter collage and our cabin before renovations!
New England continues to dig out from yet another snowstorm...I think I read 7 feet of snow in 4 storms in 1 month! And we wait for a new system to come in tonight-one in which NO one seems to know what will happen (ice, sleet, little snow, lots of 
snow?)


We have purposefully kept our large art studio cooler since we don't want to burn through too much propane. That means I can move a lot of my silk work inside the house to my office. 

There is a definite space advantage after the kids leave home!

IN my next post I'll share some of the silk projects I am doing but right now here are a few of the images of the progress we are making with our "Cabin in the Woods" which will actually be a smaller studio but still a cabin feel to it!

Enjoy our DIY efforts!


My artist hubby working late at night (with the help of a portable heater)

The mudding of the sheetrock is now DONE!